
Problem:
My friend needs to carve solid blocks of oak into curved, twisting handrail sections in order to finish a staircase for a client. Ok. Here we go.
After slogging through a sixty year old handbook written by a master Italian rail carver from San Francisco, making extremely accurate measurements of the staircase, studying everything I could on the internet about his system (called the tangent handrail method), brushing up on my plane and solid geometry, and drawing for four days straight, we ended up with this drawing on a full sheet of MDF (4 ft x 8 ft plus a little) which would (theoretically) accurately describe the three dimensional shape of a curved handrail if it were projected onto flat surface, like a block of wood.:

So, ok, next we glued up a big ol hunk of MDF to practice our carving and test our layout on. The THM gives you a big crescent shape, called the face mold, and some accurate angles that will eventually create the twist in the section, which you can see here on our practice block:

We make our first cuts with a big chop saw:

and proceed to laying out our guidelines on the actual block. This picture shows the first position of the face mold, the bevels (the profile of the handrail where it straightens out into a flat rake section instead of the curve), and the outside edge of the block that we will carve the section out of:

This picture shows the face mold slid into a position that describes the inside edge of the block, which is the top of the handrail projected onto the surface of our block. This part was really tricky, as there are different ways these angles can be transferred onto the block to give you steep rise/slow rise and L/R handrail shapes.

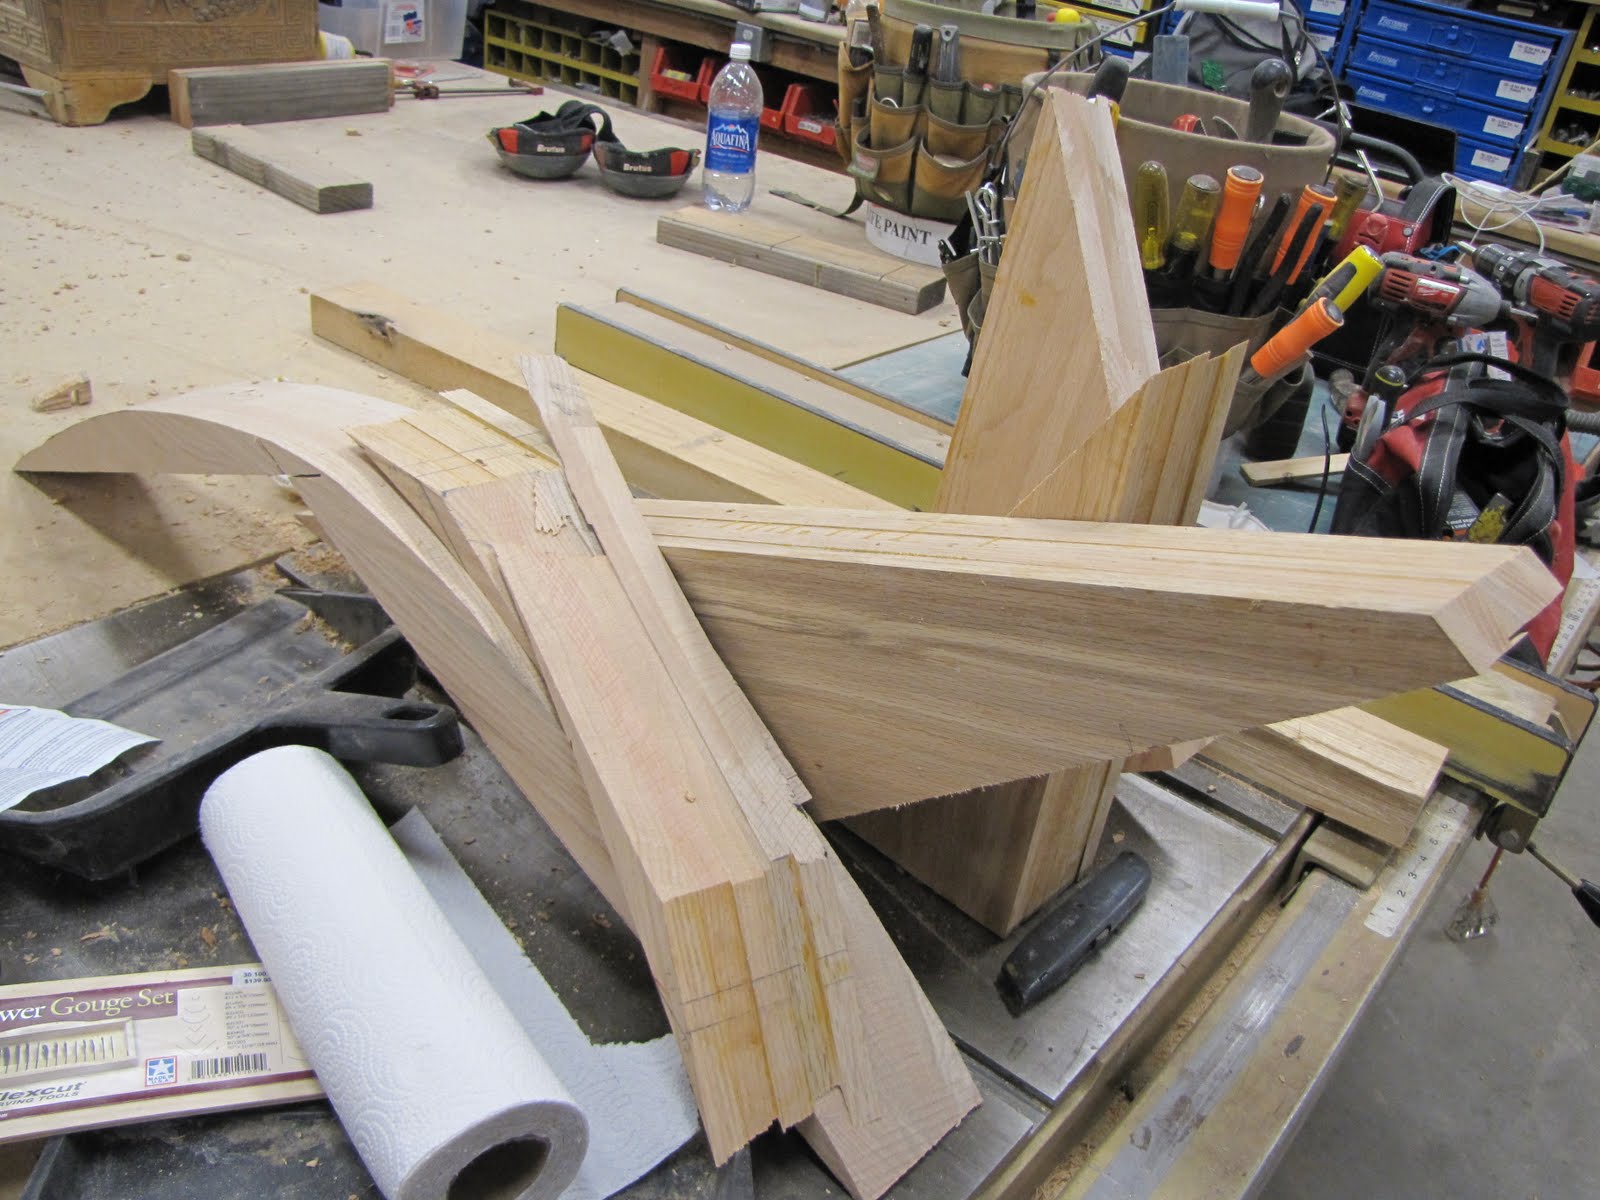
We square the edges of the pattern through the block and cut out this shape, called a "blank", with a bandsaw. We had to build tables and get a heavy duty blade to make the cut, the block probably weighed a hundred pounds to start. We realized at this point we were going to put a lot of thought into our tooling if we were going to get this thing to turn out right.

The following pictures shows the method we devised of roughing out the shape. Making it up as we went, we used a chainsaw to cut relief kerfs to our guide lines, working on what will be the sides of the handrail section first:


Then knocked the blocks out with a chisel and hammer:

And finish the shape with a right angle grinder with a very aggressive disc. Now we have a "plumb" section of handrail blank.

Then the same techniques to describe the third surface of the block, which is actually the bottom of the handrail when we put it over the staircase:

The MDF section was basically right but not perfect, so we made several models of the section, each time slightly adjusting our face mold shape and bevel angles, out of styrofoam to get it dialed in:

Once we got a model that sat perfectly over the center of the stringer cap (the curved outside edge of the staircase that we would be eventually using for a bottom rail) it was time to start on the actual oak handrail section. Our starting block needed to be 3.5 x 13 x 48 inches, and so we would have to glue many small boards together to make it. (This would also give us many slightly different grain directions, which would increase the strength and stability of the final piece.) After planing our stock planks of oak, we glued each layer laterally first:

..after the set up we ran the pieces through the planer again so we would have ultra flat boards, meaning no voids and excellent joints, and then did our final lay-up:

(thats sixty clamps and one STRONG oak block)
Final face mold and bevels on beautiful solid oak block:

Rough out "blank" with skill saw and band saw:


Drop pieces, might make fun sculptures someday:
Plumbed final handrail section, after lots and lots of chainsaw and chisel and grinding wheel action, its OAK, after all:

We join sections of the straight rake rail, called shanks, to the blank so we have sight lines to fair our bottom surface to as we carve:


And,
it fits!


and Hal's thinking, ok, now, how do we get it from looking like this:

To looking like this:

(railing we built at the top of the landing)
One day at a time, but we're glad to have made it this far. Stay tuned.


Did you guys ever consider consulting someone who actually knows how to do this? Honestly, you've worked yourself to death and used 10 time more materials than was necessary. Still I applaud your dedication and determination to DIY. I'm sure the end results will be beautiful.
ReplyDeleteOh, we tried. We talked to fifteen or twenty finish carpenters in the area, guitar makers, furniture makers, really talented guys, and nobody had a clue. We found a contractor on the east coast who had a few staircases sort of like this and the client balked at his price. We found a couple of videos on the internet
ReplyDeletehttp://www.thisiscarpentry.com/2011/11/25/traditional-tangent-handrail/
that were very helpful for layout, but our plan and pitch combos were way more complicated, plus all the fabrication examples were about a quarter of the size, small wreaths that they were able to cut with a band saw. The only guy who really seemed to know was DiChristini, http://www.amazon.com/Simplified-Custom-Stairbuilding-Tangent-Handrailing/dp/0941936635
so we figured it out the best we could. I dont think we wasted any material, except for the mdf block, but that was just a practice run. If you are thinking we could have used bender railing (the laminated strips) or the steam method, consider that we didn't have any forms to clamp to (besides the newly finished stringer and staircase itself (see picture one), which we were trying to avoid smashing at all costs), the radii that we were needing to bend to were only about 16 inches, and that it is an incline turn, necessitating a twist, which I dont think the bender railing can accomodate. It was the tangent method or bust. We battled our way through it, but I think we essentially followed the method DiChristini outlines in his book, and it turned out nice, definitely. http://www.jordanquintero.blogspot.com/2012/03/blog-post.html
If you have any other resources or expertise, or can identify where we might have missed a step in the method, I'd definitely be interested in hearing them. Thanks for having a look!
Your stair did turn out very nice and sincere compliments are are in order. Still, I'm the author of the TIC article and tangent handrail is my business (and has been for quite some time). The wreath pieces which we worked in class, were small corner segments but the same method applies to full size handrail curves.
ReplyDeleteYour big rectangular "plank" was really not necessary as the curved blank is often made from a pair of arcs, typically sawn from an 8/4 board. This board had a crescent piece cut from it which was glued to the remaining straight edge (which yields a curved board wide enough for a pair of arcs). These arcs are sandwiched together for the 3.5" thickness.
The top of the handrail should be free (ideally) of any straight lamination lines or sandwiched joints. Large or full curves should be made in 2 segments rather than one extreme curve. In some cases, a wreathed handrail can be made from a flat strake of wood no thicker than a circle inscribing the handrail profile. Either way, "a square-cut" approach rather than a full "oblique-cut", significantly reduces the size of the blank.
The cutting and squaring process is done entirely on the bandsaw and shaved and rasped true (elapsed time: 2-4 hrs). I avoid power grinders and sanders since they're dusty and hard to control (I'm working to within a degree).
Well I'm writing a book here...
There are of course, quite a lot of things to learn but once mastered, typical laminated handrail along with endless bending forms can be shelved. (Do download a free CAD program and get off your hands and knees).
I can be reached at handrailer.com
BTW,The DiCristina book is very good but no book could ever replace a full apprenticeship...this was how this stuff was taught and learned more than a century ago. We suffer today from the lack of any such instruction (wouldn't you agree?)
As a follow-up on your comments: "The MDF section was basically right but not perfect" and the necessity of "slightly adjusting our face mold shape and bevel angles". These statements lead me to suspect an error somewhere (probably in the application of the face mold).
ReplyDeleteThe tangent method is mathematical and therefore not able to produce anything other than "perfect" angles and curves. If it didn't fit correctly (perfectly) than there has to be an error somewhere! It's important to understand this point and try to find the error or you'll make it again.
I can see from your pictures that your starting tangent lines and shifted tangents, are not parallel (or at least not the way they should appear on the blank). From this I may deduce that the application of the face mold, may also have been incorrect. This would yield incorrect curves and account for joint bevels seemingly "out of plumb" etc.
I can't tell you how long it's taken me to learn some of this stuff and how many mistakes I've had to correct along the way. Still, this is a branch (of the tree) of woodworking, that needs to be better understood and preserved. The more we talk about it, the more we may profit from each other.
Anyway, two-thumbs up!(and all my fingers, such as they are) to the end results of your Herculean work and efforts (no matter how you did it).
Jim Baldwin/18th Century Handrail
Hey Jim,
ReplyDeleteWell, yeah, see, what it was, as I recall, is that we had two different tangent pitches, which the tangent method can accomodate, but there was a little spring back when they bent the stringer, forming a turn that was more of an arch than a proper quarter circle ie it started as a sixteen inch radius and ended where a fourteen inch radius would. It was crazy. So, essentially, we were trying to match the cap, which was ingeniously created by Hal with a series of oak blocks screwed and glued and sculpted with power planer and sander, by eye, rather than with the tangent method, as precisely as possible, so the balusters would sink centered on the cap and not be out of plumb. So we futzed with the models until we got one that lay down very very closely, then measured and cut adjustments to the top bevel, which, if you look closely, you can see in the final pics whee the bottom quarter turn joins with the long rake section. I hope the client doesn't read this. It was either match the cap, or adjust the rate of twist during the turn, I think. It was also tricky Hal sincerely felt that the tangent method was a form of voodoo and wouldn't really accept it as a valid method for another few weeks after this post. We were sussing this out on the fly, and, like I said, everyone that we talked to about it thought we were crazy to try it.
Check out the next post, because onces I had the first section under my belt we started to cruise. I doubt I'll ever come across a half completed staircase that needs a wreathed handrail again, but if I do, it will be easier the second time through without a doubt. I wanted to put these pics up to help out any poor schmuck in our situation trying to solve something like this thing with the book and your videos alone. Your videos are great, btw, and helped ommensely. But, like I said, I think they are sort of an intro example, and this staircase had every combination of pitch and plan and monks and wobbles and deign no-nos that could possibly exist (note the windows behind it, wtf?) so, yeah, we did the best we could. If we were framing it ourselves, it would have turned out better and been a lot easier, I'm pretty sure.
The actual fabrication techniques I think proved to be pretty efficient, also, for the scale of the wreathes we needed to carve. The chainsaw seems brutal, but there was just no way to square it on the band saw, it was way to big and heavy. Once it was squared, however, we built a fin table for the bandsaw and I was able to shave the sides down in that way. Maybe we could have broken it into two pieces, but we were really having a hard time keeping the shape coherent in our minds on piece, I think we would have fallen to pieces breaking it up any smaller. You know that oblique and accute plans have their own series of lay out adjustment.
Anyway,
Oh, and chainsawsculptors.com is where we got those bitchen rotary tools you used in your videos, that took us forever to find.
Cool, I'm glad you saw the post, and I'm glad you had your videos up, couldn't have done it without them, so thanks again! Take care
JQ
You may have me partly confused with someone else, I didn't post any videos of chain-saw rotary tools.
ReplyDeleteYes, there are 3 different tangent plan arraignments,"square, acute and obtuse" and each has 3 possible tangent pitch combinations. All of these (and a few more) are found in your DiCristina book. BTW the tangent method can accommodate any free-form plan curve but you do need to accurately reproduce it in your plan drawing first.
Yes, large curved handrail segments can be unwieldy but honestly, a chain saw is a bit extreme. Before the band saw, a professional handrailer used his frame saw to cut wreathed railings. I cut large curved segments all the time on the bandsaw. The trick is to start with the proper sized blank and rough off the heavy side-slabs first. After that the whole piece is significantly lighter. A 4X4 handrail, 3-5' in length is typical.
The tangent method is not just for handrail either but any wreathed stair trim or component. A solid 1X6 stub-wall cap for example or a helical shoe-rail molding. It's not voodoo either but common 19th century woodworking (that still works today).
The problem with almost all stair and handrail books is that they fail to describe or adequately illustrate the practical aspects of wreath making. The older books take it for granted that "the reader" will have at least passable hand carving skills. Not much need be said about this since this was common knowledge. Today nothing could be further from the truth.
Well, I'm rambling on here...